Big Ideas,
Real Impact.
Driven by curiosity and built on purpose, this is where bold thinking meets thoughtful execution.
-

Movement.
-

Strength.
-

Flexabilty.
-

Nutrition.
-

Yoga.
-

Breathing.
-

Cuisine.
-

Sleep.
-

Recovery.
-

Pain Prevention.
-

Motivation.
-

Habits.
Our Experts
-

Sarah Davis
-

Ashley Napoli
-
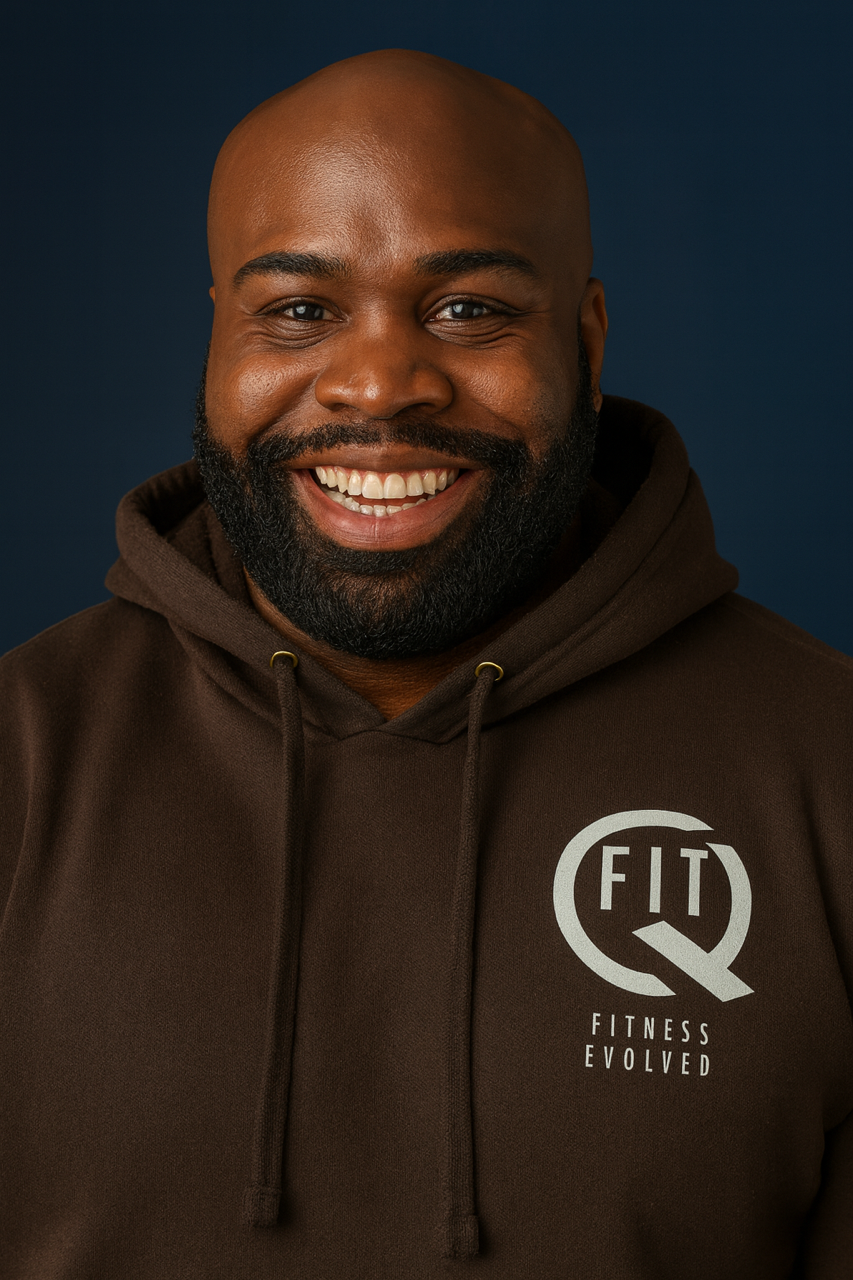
Quavon Reede
-
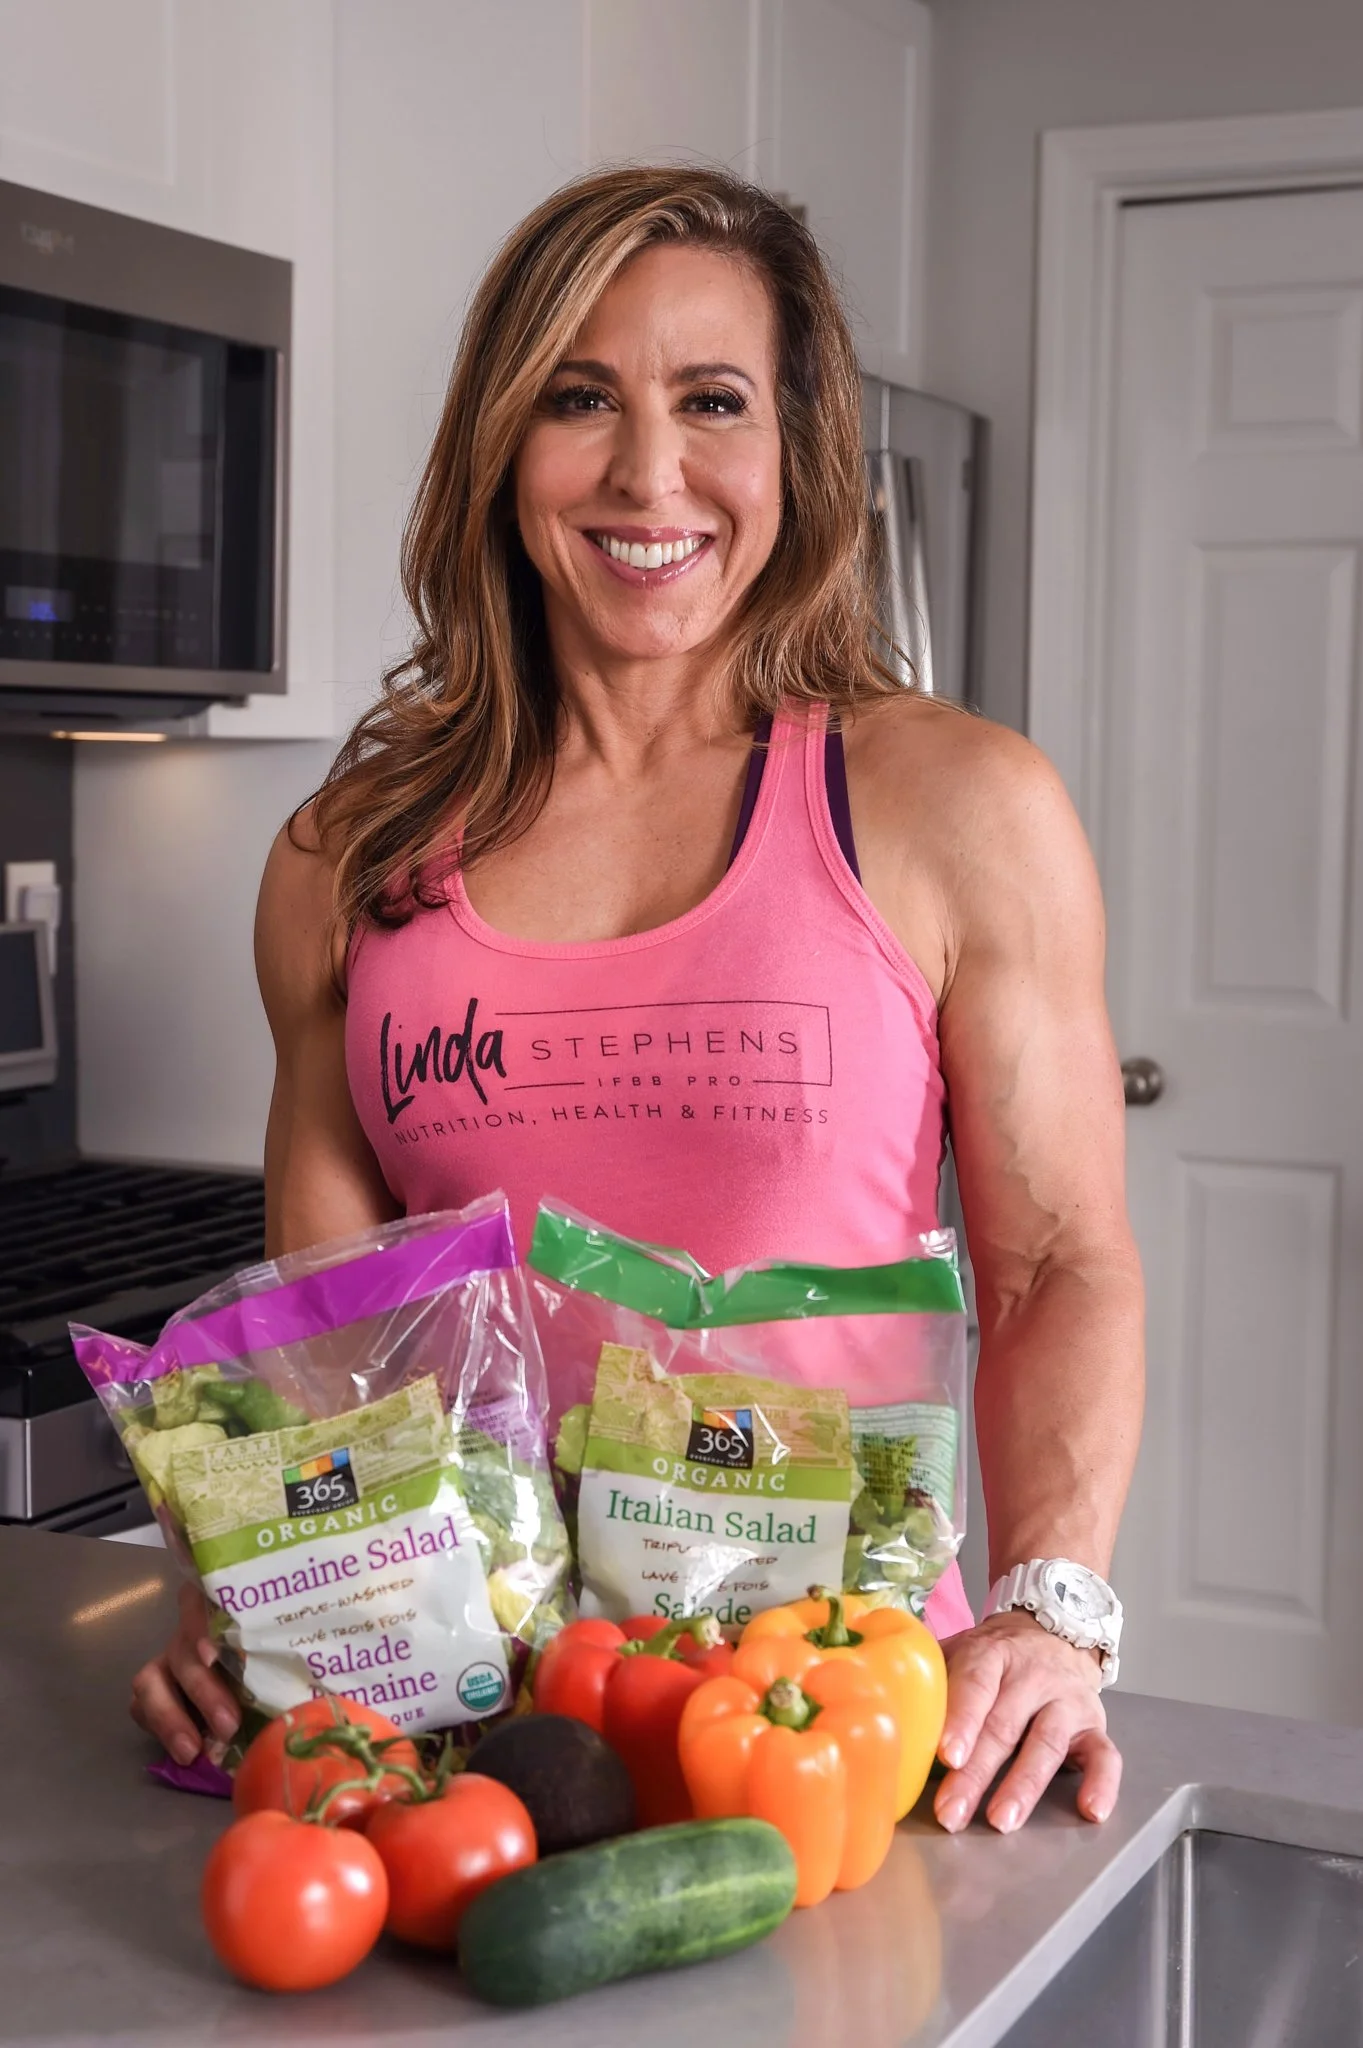
Linda Stephens
8 Essential Body Movements
Squat. Plank. Push. Hang. Pull. Jump. Carry. Move.
Master these, and you build a body that moves better, feels stronger, and handles life with more confidence.
Squats
Squats are a fundamental bodyweight exercise where you bend at the hips, knees, and ankles to lower your body, then stand back up.
They strengthen the legs, glutes, hips, core, and lower back, while also improving balance, mobility, and everyday function.
A squat is a natural movement pattern that trains the body to sit, stand, lift, and move with strength and control.
Squats are not just an exercise. They are a foundation of functional strength — helping us stay powerful, mobile, and independent throughout life.
-
Goal: build strength, mobility, balance, and confidence.
1. Warm Up — 3 minutes
Do each movement slowly:
March in place — 30 seconds
Hip circles — 30 seconds each direction
Bodyweight good mornings — 10 reps
Ankle rocks — 10 each side
Gentle half squats — 10 reps2. Main Routine
Chair Squat
2 sets of 8–10 reps
Stand in front of a chair.
Feet about shoulder-width apart.
Sit hips back toward the chair.
Lightly touch the chair, then stand back up.Focus: control, balance, and good posture.
Wall Squat Hold
2 rounds of 15–20 seconds
Lean your back against a wall.
Slide down slightly, not too deep.
Keep knees comfortable and chest lifted.Focus: leg strength and stability.
Assisted Squat
2 sets of 8 reps
Hold onto a countertop, railing, or sturdy chair.
Lower slowly into a comfortable squat.
Use your hands lightly for balance.Focus: confidence and range of motion.
3. Cool Down — 2 minutes
Standing quad stretch — 20 seconds each side
Calf stretch — 20 seconds each side
Gentle forward fold — 20 seconds
Deep breathing — 3 slow breathsSimple Weekly Plan
Do this routine 2–3 times per week, with at least one rest day between session.
A beginner squat routine teaches the body how to sit, stand, and move with strength, balance, and control — one repetition at a time.
-
Intermediate Squat Routine
Goal: build stronger legs, hips, glutes, core stability, and better control.
1. Warm Up — 5 minutes
March or light jog in place — 1 minute
Hip circles — 10 each direction
Leg swings — 10 each side
Bodyweight good mornings — 10 reps
Ankle rocks — 10 each side
Easy bodyweight squats — 10 reps2. Main Routine
Bodyweight Squat
3 sets of 12–15 reps
Stand with feet shoulder-width apart.
Sit hips back and down.
Keep chest lifted and knees tracking over toes.
Stand tall and squeeze the glutes at the top.Focus: smooth movement and full control.
Goblet Squat
3 sets of 8–12 reps
Hold a dumbbell, kettlebell, or weight close to your chest.
Lower into a squat with control.
Press through the heels and mid-foot to stand.Focus: strength, posture, and depth.
Split Squat
2–3 sets of 8–10 reps each leg
Stand in a staggered stance.
Lower straight down by bending both knees.
Keep your front knee stable and your torso tall.Focus: single-leg strength and balance.
Squat Hold
2 rounds of 30–45 seconds
Lower into a comfortable squat position.
Hold steady while keeping your chest lifted.
Breathe slowly.Focus: endurance, mobility, and stability.
3. Optional Finisher
Squat Pulses
2 sets of 15–20 small pulses
Stay low in the squat and make small controlled movements up and down.
Focus: leg endurance and control.
4. Cool Down — 3 minutes
Quad stretch — 30 seconds each side
Hamstring stretch — 30 seconds each side
Calf stretch — 30 seconds each side
Hip flexor stretch — 30 seconds each side
Slow breathing — 3–5 breathsSimple Weekly Plan
Do this routine 2–3 times per week, leaving at least one rest day between sessions.
An intermediate squat routine builds the strength, stability, and confidence needed to move through life with power and control.
-
Advanced Squat Routine
Goal: build power, strength, balance, mobility, and muscular endurance.
1. Warm Up — 6–8 minutes
Light jog or jump rope — 1 minute
Hip circles — 10 each direction
Leg swings — 10 each side
Walking lunges — 10 each leg
Bodyweight squats — 15 reps
Squat hold with reach — 30 seconds
Glute bridges — 12 reps2. Main Routine
Weighted Goblet Squat
4 sets of 8–10 reps
Hold a dumbbell or kettlebell close to your chest.
Lower with control, keep the chest lifted, then drive up strong.Focus: strength, depth, and posture.
Bulgarian Split Squat
3 sets of 8–10 reps each leg
Place one foot behind you on a bench or step.
Lower slowly, keeping the front knee stable.
Press through the front foot to rise.Focus: single-leg strength, balance, and control.
Jump Squat
3 sets of 8–12 reps
Lower into a squat, then explode upward into a jump.
Land softly with knees bent and chest lifted.Focus: power, speed, and athletic movement.
Tempo Squat
3 sets of 6–8 reps
Lower for 3–5 seconds, pause briefly at the bottom, then stand strong.
Focus: control, stability, and time under tension.
Squat Hold
2 rounds of 45–60 seconds
Hold a strong squat position.
Keep your chest up, feet grounded, and breathing steady.Focus: endurance and mental toughness.
3. Finisher
Squat Pulses + Full Squats
Do 20 squat pulses, then immediately do 10 full squats.
Repeat 2 rounds.Focus: leg endurance and burn.
4. Cool Down — 4 minutes
Quad stretch — 30 seconds each side
Hamstring stretch — 30 seconds each side
Hip flexor stretch — 30 seconds each side
Calf stretch — 30 seconds each side
Deep squat hold — 30 seconds
Slow breathing — 5 breathsWeekly Plan
Do this routine 2 times per week, with recovery days between sessions.
An advanced squat routine challenges the body to move with strength, power, balance, and control — building the kind of resilience that supports lifelong performance.
Quavon Reede: Squats
Planks are a core-strengthening exercise where you hold your body in a straight, stable position, usually supported by your forearms or hands and toes.
They strengthen the abdominals, back, shoulders, hips, and glutes, while improving posture, balance, and stability.
A simple definition:
A plank is an exercise that trains the body to stay strong, steady, and aligned.
Planks are not just about holding still. They build the core strength and stability that support every movement we make.
Ashley Napoli: Malasana
-
Do this 3 days per week, with a rest day between sessions.
Week 1–2: Build the Pattern
Warm-Up
Do 1–2 minutes:
Arm circles
Shoulder rolls
Cat-cow stretch
Wall push-ups, easy paceWorkout
1. Wall Push-Ups
2 sets of 8–12 reps2. Incline Push-Ups
Use a counter, bench, or sturdy table.
2 sets of 5–8 reps3. Plank Hold
2 rounds of 10–20 secondsRest 45–60 seconds between sets.
Form Checklist
Keep your body in a straight line.
Hands slightly wider than shoulders.
Lower your chest toward the wall, counter, or floor.
Keep elbows about 45 degrees from your body.
Push the surface away at the top.
Do not let your hips sag.
Progression Goal
When you can do:
2 sets of 12 wall push-ups
and
2 sets of 10 incline push-upsmove to a lower surface, like a bench. Eventually progress to floor push-ups.
Simple Goal
Your first goal is not maximum reps.
Your first goal is:
Good form + consistency + control
Even 5 good push-ups are better than 20 sloppy ones.
-
Do this 3 days per week, with at least one rest day between sessions.
Warm-Up
Do 3–5 minutes:
Arm circles
Shoulder rolls
Cat-cow stretch
Scapular push-ups
Easy incline push-upsWorkout
1. Standard Push-Ups
3 sets of 8–15 reps
Focus on control. Lower slowly, push strong.
Rest 60–90 seconds between sets.
2. Slow Tempo Push-Ups
2 sets of 5–8 reps
Lower for 3 seconds, pause briefly, then push up.
This builds strength and control.
3. Incline Burnout Set
Use a bench, counter, or sturdy table.
1–2 sets of 12–20 reps
This lets you add volume after your regular push-ups.
4. Plank Shoulder Taps
2 sets of 10–20 taps
Keep hips steady. This strengthens the core and shoulders.
5. Side Plank
2 rounds per side
Hold for 15–30 seconds.
Weekly Progression
When you can do 3 sets of 15 clean standard push-ups, make it harder by adding one of these:
Slower lowering
A pause at the bottom
Feet-elevated push-ups
More total sets
Diamond or close-grip push-upsForm Checklist
Body stays straight
Hands slightly wider than shoulders
Elbows about 45 degrees from the body
Chest lowers toward the floor
Core stays tight
No sagging hips
No rushing repsGoal
Build toward:
40–60 total clean push-ups per workout
Quality matters more than speed.
-
Do this 3 days per week, with at least one rest day between sessions.
Warm-Up
Do 5 minutes:
Arm circles
Shoulder rolls
Cat-cow
Scapular push-ups
Plank shoulder taps
Easy push-upsAdvanced Workout
1. Standard Push-Ups
3 sets of 15–25 reps
Use clean form. Full range of motion. No sagging hips.
2. Tempo Push-Ups
3 sets of 6–10 reps
Lower for 4 seconds, pause for 1 second, then push up strong.
This builds control and strength.
3. Feet-Elevated Push-Ups
Put your feet on a bench, step, or sturdy chair.
3 sets of 8–15 reps
This increases shoulder, chest, and core demand.
4. Close-Grip Push-Ups
Hands slightly inside shoulder width.
2–3 sets of 8–15 reps
This targets the triceps and inner chest more.
5. Plyometric Push-Ups
Push explosively so your hands briefly leave the floor.
3 sets of 3–8 reps
Land softly. Stop if your form breaks.
6. Core Finisher
Plank hold: 45–60 seconds
Side plank: 30–45 seconds per side
Mountain climbers: 30 secondsDo 2 rounds.
Advanced Goal
Build toward:
75–100 total clean push-ups per workout
Once that feels strong, progress to harder variations:
Archer push-ups
Diamond push-ups
Deficit push-ups
Spiderman push-ups
One-arm push-up progressionsForm Checklist
Keep your body in a straight line.
Brace your core.
Lower with control.
Keep elbows around 45 degrees from your body.
Push the floor away at the top.
Stop before sloppy reps.Advanced push-ups should feel powerful, not painful.
Ashley Napoli: Planks

Planks
-
Do this routine 3 days per week, with a rest day between sessions.
Warm-Up: 2–3 Minutes
March in place, roll your shoulders, gently twist side to side, and take a few deep breaths.
Routine
1. Wall Plank
Place your hands on a wall, step your feet back, and keep your body straight.
Hold: 20–30 seconds
Rest: 30 seconds
Repeat: 2 times2. Incline Plank
Place your hands on a sturdy bench, chair, or countertop. Keep your shoulders over your hands and your body in one straight line.
Hold: 15–20 seconds
Rest: 30 seconds
Repeat: 2 times3. Knee Plank
Start on the floor with your elbows under your shoulders and your knees down. Keep your hips low and your core gently tight.
Hold: 10–20 seconds
Rest: 30–45 seconds
Repeat: 2 times4. Full Plank Practice
Try a regular plank from your toes. Stop before your hips sag.
Hold: 5–10 seconds
Rest: 45 seconds
Repeat: 2 timesBeginner Goal
Work toward holding a good plank for 30 seconds with proper form.
Good form matters more than time.
Key Form Tips
Keep your body straight from head to heels.
Pull your belly button gently toward your spine.
Do not let your hips sag or lift too high.
Breathe slowly and steadily.
Keep your neck relaxed and eyes looking slightly ahead.Progression
When this feels easy, increase each hold by 5 seconds.
A strong plank builds core strength, posture, balance, and confidence.
-
Do this routine 3–4 days per week, with rest or lighter core work between sessions.
Warm-Up: 3–5 Minutes
March in place, do shoulder rolls, arm circles, gentle torso twists, and a few cat-cow stretches.
Routine
1. Forearm Plank
Keep elbows under shoulders, legs straight, and body in one strong line.
Hold: 30–45 seconds
Rest: 30 seconds
Repeat: 3 times2. High Plank
Start in a push-up position with hands under shoulders. Keep your core tight and avoid letting your hips sag.
Hold: 30–45 seconds
Rest: 30 seconds
Repeat: 3 times3. Side Plank
Lie on one side with elbow under shoulder. Lift hips and keep your body straight.
Hold: 20–30 seconds per side
Rest: 30 seconds
Repeat: 2 times per side4. Plank Shoulder Taps
From a high plank, tap one shoulder with the opposite hand. Keep hips as still as possible.
Reps: 10–16 total taps
Rest: 30–45 seconds
Repeat: 2–3 times5. Plank Knee Drives
From a high plank, slowly bring one knee toward your chest, then return. Alternate sides.
Reps: 10–12 per side
Rest: 45 seconds
Repeat: 2 timesFinisher: Plank Hold
Choose your best plank position — forearm or high plank.
Hold: 45–60 seconds
Repeat: 1 timeIntermediate Goal
Build toward holding a clean plank for 60 seconds while also controlling movement during shoulder taps and knee drives.
Key Form Tips
Keep your ribs pulled down and core engaged.
Do not let your lower back sag.
Keep shoulders strong but not tense.
Breathe steadily throughout each hold.
Move slowly and with control.Intermediate plank training builds core strength, shoulder stability, posture, and mental toughness.
-
Do this routine 3–4 days per week. Focus on control, alignment, and quality over speed.
Warm-Up: 5 Minutes
Do arm circles, shoulder rolls, cat-cow stretches, hip circles, torso twists, and light mountain climbers.
Routine
1. Forearm Plank Hold
Keep elbows under shoulders, legs straight, glutes engaged, and body in one strong line.
Hold: 60–90 seconds
Rest: 30–45 seconds
Repeat: 3 times2. High Plank Shoulder Taps
From a push-up position, tap one shoulder with the opposite hand while keeping your hips still.
Reps: 20–30 total taps
Rest: 30–45 seconds
Repeat: 3 times3. Side Plank with Hip Dips
Start in a side plank. Lower your hips slightly, then lift them back up.
Reps: 10–15 per side
Rest: 30 seconds
Repeat: 2–3 times per side4. Plank Knee-to-Elbow
From a high plank, bring one knee toward the same-side elbow, then return. Alternate sides.
Reps: 10–15 per side
Rest: 45 seconds
Repeat: 3 times5. Plank Walkouts
Start standing, hinge forward, walk your hands out to a high plank, hold briefly, then walk back.
Reps: 8–10
Rest: 45–60 seconds
Repeat: 3 times6. Plank Jacks
From a high plank, jump both feet out and in while keeping your upper body steady.
Reps: 20–30
Rest: 45 seconds
Repeat: 2–3 timesFinisher: Plank Ladder
Complete the following with short rest between each:
30 seconds forearm plank
30 seconds right side plank
30 seconds left side plank
30 seconds high plank
30 seconds forearm plankAdvanced Goal
Build toward 2 minutes of clean plank control and strong movement without letting your hips sag, twist, or lift too high.
Key Form Tips
Keep your core tight and ribs pulled down.
Squeeze your glutes to protect your lower back.
Press the floor away through your shoulders.
Move slowly and with control.
Stop if your form breaks.Advanced planks build core power, shoulder stability, balance, endurance, and mental toughness.
Q Planks
Benefits of Push-Ups
Push-ups are one of the best bodyweight exercises because they train several muscles at once and require no equipment.
Main benefits:
Builds upper-body strength
Push-ups strengthen the chest, shoulders, triceps, and upper back.
Improves core stability
A good push-up is also a moving plank. Your abs, hips, and lower back work to keep your body straight.
Supports better posture
Strengthening the chest, shoulders, and core can help improve posture and shoulder control.
Boosts functional strength
Push-ups train the kind of strength you use in daily life: pushing yourself up, lifting, carrying, and bracing.
Can improve confidence
They are easy to measure. Going from 2 push-ups to 10 or 20 builds a real sense of progress.
Protects joints when done correctly
Strong shoulders, arms, and core muscles can help support the shoulder and elbow joints.
Simple beginner goal
Start with wall push-ups or incline push-ups on a bench or counter.
Ashley Napoli: Planks
Push-ups
Ashley Napoli: Planks
-
Do this routine 3 days per week, with a rest day between sessions.
Warm-Up: 2–3 Minutes
March in place, roll your shoulders, gently twist side to side, and take a few deep breaths.
Routine
1. Wall Plank
Place your hands on a wall, step your feet back, and keep your body straight.
Hold: 20–30 seconds
Rest: 30 seconds
Repeat: 2 times2. Incline Plank
Place your hands on a sturdy bench, chair, or countertop. Keep your shoulders over your hands and your body in one straight line.
Hold: 15–20 seconds
Rest: 30 seconds
Repeat: 2 times3. Knee Plank
Start on the floor with your elbows under your shoulders and your knees down. Keep your hips low and your core gently tight.
Hold: 10–20 seconds
Rest: 30–45 seconds
Repeat: 2 times4. Full Plank Practice
Try a regular plank from your toes. Stop before your hips sag.
Hold: 5–10 seconds
Rest: 45 seconds
Repeat: 2 timesBeginner Goal
Work toward holding a good plank for 30 seconds with proper form.
Good form matters more than time.
Key Form Tips
Keep your body straight from head to heels.
Pull your belly button gently toward your spine.
Do not let your hips sag or lift too high.
Breathe slowly and steadily.
Keep your neck relaxed and eyes looking slightly ahead.Progression
When this feels easy, increase each hold by 5 seconds.
A strong plank builds core strength, posture, balance, and confidence.
-
Do this routine 3–4 days per week, with rest or lighter core work between sessions.
Warm-Up: 3–5 Minutes
March in place, do shoulder rolls, arm circles, gentle torso twists, and a few cat-cow stretches.
Routine
1. Forearm Plank
Keep elbows under shoulders, legs straight, and body in one strong line.
Hold: 30–45 seconds
Rest: 30 seconds
Repeat: 3 times2. High Plank
Start in a push-up position with hands under shoulders. Keep your core tight and avoid letting your hips sag.
Hold: 30–45 seconds
Rest: 30 seconds
Repeat: 3 times3. Side Plank
Lie on one side with elbow under shoulder. Lift hips and keep your body straight.
Hold: 20–30 seconds per side
Rest: 30 seconds
Repeat: 2 times per side4. Plank Shoulder Taps
From a high plank, tap one shoulder with the opposite hand. Keep hips as still as possible.
Reps: 10–16 total taps
Rest: 30–45 seconds
Repeat: 2–3 times5. Plank Knee Drives
From a high plank, slowly bring one knee toward your chest, then return. Alternate sides.
Reps: 10–12 per side
Rest: 45 seconds
Repeat: 2 timesFinisher: Plank Hold
Choose your best plank position — forearm or high plank.
Hold: 45–60 seconds
Repeat: 1 timeIntermediate Goal
Build toward holding a clean plank for 60 seconds while also controlling movement during shoulder taps and knee drives.
Key Form Tips
Keep your ribs pulled down and core engaged.
Do not let your lower back sag.
Keep shoulders strong but not tense.
Breathe steadily throughout each hold.
Move slowly and with control.Intermediate plank training builds core strength, shoulder stability, posture, and mental toughness.
-
Do this routine 3–4 days per week. Focus on control, alignment, and quality over speed.
Warm-Up: 5 Minutes
Do arm circles, shoulder rolls, cat-cow stretches, hip circles, torso twists, and light mountain climbers.
Routine
1. Forearm Plank Hold
Keep elbows under shoulders, legs straight, glutes engaged, and body in one strong line.
Hold: 60–90 seconds
Rest: 30–45 seconds
Repeat: 3 times2. High Plank Shoulder Taps
From a push-up position, tap one shoulder with the opposite hand while keeping your hips still.
Reps: 20–30 total taps
Rest: 30–45 seconds
Repeat: 3 times3. Side Plank with Hip Dips
Start in a side plank. Lower your hips slightly, then lift them back up.
Reps: 10–15 per side
Rest: 30 seconds
Repeat: 2–3 times per side4. Plank Knee-to-Elbow
From a high plank, bring one knee toward the same-side elbow, then return. Alternate sides.
Reps: 10–15 per side
Rest: 45 seconds
Repeat: 3 times5. Plank Walkouts
Start standing, hinge forward, walk your hands out to a high plank, hold briefly, then walk back.
Reps: 8–10
Rest: 45–60 seconds
Repeat: 3 times6. Plank Jacks
From a high plank, jump both feet out and in while keeping your upper body steady.
Reps: 20–30
Rest: 45 seconds
Repeat: 2–3 timesFinisher: Plank Ladder
Complete the following with short rest between each:
30 seconds forearm plank
30 seconds right side plank
30 seconds left side plank
30 seconds high plank
30 seconds forearm plankAdvanced Goal
Build toward 2 minutes of clean plank control and strong movement without letting your hips sag, twist, or lift too high.
Key Form Tips
Keep your core tight and ribs pulled down.
Squeeze your glutes to protect your lower back.
Press the floor away through your shoulders.
Move slowly and with control.
Stop if your form breaks.Advanced planks build core power, shoulder stability, balance, endurance, and mental toughness.
Planks are a core-strengthening exercise where you hold your body in a straight, stable position, usually supported by your forearms or hands and toes.
They strengthen the abdominals, back, shoulders, hips, and glutes, while improving posture, balance, and stability.
A simple definition:
A plank is an exercise that trains the body to stay strong, steady, and aligned.
Planks are not just about holding still. They build the core strength and stability that support every movement we make.
Ashley Napoli: Planks
Pull
Ashley Napoli: Planks
-
Beginner Bar Hang Routine
Do this 2–3 days per week, with at least one rest day between sessions.
Warm-Up
Do 3–5 minutes:
Shoulder rolls
Arm circles
Wrist circles
Cat-cow stretch
Easy wall push-upsRoutine
1. Assisted Dead Hang
Hold the bar with both hands.
Keep your feet lightly on the floor, box, or bench.
Let your arms straighten, but stay controlled.
3 sets of 10–20 seconds
Rest 60 seconds between sets.
2. Active Shoulder Hang
From the hanging position, gently pull your shoulders down away from your ears.
Do not bend your elbows.
Hold for 2 seconds, then relax.
2 sets of 5 reps
This teaches shoulder control.
3. Grip Hold
Stand under the bar and hold it tight without fully hanging.
Squeeze the bar for:
3 rounds of 10–15 seconds
This builds grip strength safely.
Weekly Goal
Start with:
30–60 total seconds of hanging per workout
Build slowly toward:
90–120 total seconds
Form Tips
Keep your ribs down.
Brace your core gently.
Avoid swinging.
Do not force the shoulder stretch.
Stop if you feel sharp pain, numbness, or tingling.
Beginner goal
Your first goal is simple:
Hang safely, build grip, and teach your shoulders control.
-
Do this 2–3 days per week, with at least one rest day between sessions.
Warm-Up
Do 3–5 minutes:
Shoulder rolls
Arm circles
Wrist circles
Cat-cow
Scapular push-ups
Easy assisted hangsIntermediate Routine
1. Dead Hang
Hang with both hands, arms straight, body still.
3 sets of 20–40 seconds
Rest 60–90 seconds between sets.
Goal: build grip, shoulder endurance, and confidence on the bar.
2. Active Hang
From a dead hang, gently pull your shoulders down away from your ears.
Do not bend your elbows.
Hold that strong position.
3 sets of 10–20 seconds
This strengthens the shoulders and upper back.
3. Scapular Pulls
Start in a dead hang.
Pull your shoulder blades down and back slightly.
Lift your body just a little without bending your elbows.
Lower with control.
3 sets of 5–8 reps
This is a key step toward pull-ups.
4. Knee Raise Hold
Hang from the bar and slowly bring your knees up slightly.
Hold for:
2–3 sets of 5–10 seconds
Keep your body from swinging.
This adds core strength.
5. Grip Finisher
Hang as long as you can with good form.
1 final set
Stop before your grip completely fails.
Weekly Goal
Build toward:
2–3 minutes total hanging time per workout
Once you can do that comfortably, progress to:
Dead hangs over 45 seconds
More scapular pulls
Hanging knee raises
Assisted pull-upsForm Checklist
Shoulders controlled
Core lightly braced
No swinging
Ribs down
Hands gripping firmly
Stop if you feel sharp pain, numbness, or tinglingThe goal is not just to hang longer. The goal is to hang with control, strength, and stable shoulders.
-
1. Dead Hang
Hang with both hands, arms straight, body still.
3 sets of 45–60 seconds
Rest 60–90 seconds between sets.
Goal: grip endurance and shoulder durability.
2. Active Hang
Pull your shoulders down away from your ears without bending your elbows.
Hold a strong, controlled position.
3 sets of 20–30 seconds
This builds shoulder stability and upper-back strength.
3. Scapular Pulls
Start in a dead hang.
Pull your shoulder blades down and slightly back.
Lift your body a few inches without bending your elbows.
Lower slowly.
3 sets of 8–12 reps
4. Hanging Knee Raises
Hang from the bar.
Bring your knees up toward your chest.
Lower slowly without swinging.
3 sets of 8–12 reps
For a harder version, do straight-leg raises.
5. Towel Hang
Loop a towel over the bar and hold both ends.
Hang with control.
3 sets of 10–30 seconds
This is excellent for grip and forearm strength.
6. One-Arm Assisted Hang
Hold the bar with one hand.
Use the other hand lightly on the bar or a towel for assistance.
2 sets per side of 10–20 seconds
Do not rush this one. It is very demanding on the shoulder and grip.
Advanced Goal
Build toward:
4–6 total minutes of hanging per workout
Then progress to:
Pull-up negatives
Assisted one-arm hangs
L-sit hangs
Strict hanging leg raises
Weighted hangsForm Checklist
Shoulders stay controlled.
Core stays tight.
No swinging.
Grip stays firm.
Ribs stay down.
Stop before form breaks.Important Safety Note
Advanced hanging should feel challenging, not painful. Stop if you feel shoulder pain, elbow pain, numbness, or tingling.
Main benefits of bar hanging
Builds grip strength
Your hands, fingers, wrists, and forearms work hard just to hold your body weight.
Strengthens shoulders
A controlled hang can improve shoulder stability and endurance.
Supports pull-up progress
Dead hangs are one of the best beginner steps toward pull-ups because they build the grip and shoulder strength needed to pull.
Improves core control
If you keep your ribs down and avoid swinging, your abs help stabilize your body.
Helps posture and mobility
Hanging can open the shoulders and upper back, which may help counter tightness from sitting.
Beginner routine
Try this 2–3 days per week:
Dead hang: 3 sets of 10–20 seconds
Rest 60 seconds between sets.
Start with your feet lightly touching the floor or a box if full body weight feels too hard.
Progression
Once you can hang for 30–45 seconds, add:
Scapular hangs
Hang from the bar, then gently pull your shoulders down away from your ears without bending your elbows. Hold 2 seconds, relax, repeat.
Do 2 sets of 5–8 reps.
Important form tip
Do not just “dump” into the shoulders. Keep a little control: ribs down, core lightly tight, shoulders not painfully stretched.
If you have shoulder pain, a history of rotator cuff issues, or numbness/tingling, stop and use an assisted hang or ask a physical therapist first.
Ashley Napoli: Planks
Bar Hang
Ashley Napoli: Planks
-
Do this routine 3 days per week, with a rest day between sessions.
Warm-Up: 2–3 Minutes
March in place, roll your shoulders, gently twist side to side, and take a few deep breaths.
Routine
1. Wall Plank
Place your hands on a wall, step your feet back, and keep your body straight.
Hold: 20–30 seconds
Rest: 30 seconds
Repeat: 2 times2. Incline Plank
Place your hands on a sturdy bench, chair, or countertop. Keep your shoulders over your hands and your body in one straight line.
Hold: 15–20 seconds
Rest: 30 seconds
Repeat: 2 times3. Knee Plank
Start on the floor with your elbows under your shoulders and your knees down. Keep your hips low and your core gently tight.
Hold: 10–20 seconds
Rest: 30–45 seconds
Repeat: 2 times4. Full Plank Practice
Try a regular plank from your toes. Stop before your hips sag.
Hold: 5–10 seconds
Rest: 45 seconds
Repeat: 2 timesBeginner Goal
Work toward holding a good plank for 30 seconds with proper form.
Good form matters more than time.
Key Form Tips
Keep your body straight from head to heels.
Pull your belly button gently toward your spine.
Do not let your hips sag or lift too high.
Breathe slowly and steadily.
Keep your neck relaxed and eyes looking slightly ahead.Progression
When this feels easy, increase each hold by 5 seconds.
A strong plank builds core strength, posture, balance, and confidence.
-
Do this routine 3–4 days per week, with rest or lighter core work between sessions.
Warm-Up: 3–5 Minutes
March in place, do shoulder rolls, arm circles, gentle torso twists, and a few cat-cow stretches.
Routine
1. Forearm Plank
Keep elbows under shoulders, legs straight, and body in one strong line.
Hold: 30–45 seconds
Rest: 30 seconds
Repeat: 3 times2. High Plank
Start in a push-up position with hands under shoulders. Keep your core tight and avoid letting your hips sag.
Hold: 30–45 seconds
Rest: 30 seconds
Repeat: 3 times3. Side Plank
Lie on one side with elbow under shoulder. Lift hips and keep your body straight.
Hold: 20–30 seconds per side
Rest: 30 seconds
Repeat: 2 times per side4. Plank Shoulder Taps
From a high plank, tap one shoulder with the opposite hand. Keep hips as still as possible.
Reps: 10–16 total taps
Rest: 30–45 seconds
Repeat: 2–3 times5. Plank Knee Drives
From a high plank, slowly bring one knee toward your chest, then return. Alternate sides.
Reps: 10–12 per side
Rest: 45 seconds
Repeat: 2 timesFinisher: Plank Hold
Choose your best plank position — forearm or high plank.
Hold: 45–60 seconds
Repeat: 1 timeIntermediate Goal
Build toward holding a clean plank for 60 seconds while also controlling movement during shoulder taps and knee drives.
Key Form Tips
Keep your ribs pulled down and core engaged.
Do not let your lower back sag.
Keep shoulders strong but not tense.
Breathe steadily throughout each hold.
Move slowly and with control.Intermediate plank training builds core strength, shoulder stability, posture, and mental toughness.
-
Do this routine 3–4 days per week. Focus on control, alignment, and quality over speed.
Warm-Up: 5 Minutes
Do arm circles, shoulder rolls, cat-cow stretches, hip circles, torso twists, and light mountain climbers.
Routine
1. Forearm Plank Hold
Keep elbows under shoulders, legs straight, glutes engaged, and body in one strong line.
Hold: 60–90 seconds
Rest: 30–45 seconds
Repeat: 3 times2. High Plank Shoulder Taps
From a push-up position, tap one shoulder with the opposite hand while keeping your hips still.
Reps: 20–30 total taps
Rest: 30–45 seconds
Repeat: 3 times3. Side Plank with Hip Dips
Start in a side plank. Lower your hips slightly, then lift them back up.
Reps: 10–15 per side
Rest: 30 seconds
Repeat: 2–3 times per side4. Plank Knee-to-Elbow
From a high plank, bring one knee toward the same-side elbow, then return. Alternate sides.
Reps: 10–15 per side
Rest: 45 seconds
Repeat: 3 times5. Plank Walkouts
Start standing, hinge forward, walk your hands out to a high plank, hold briefly, then walk back.
Reps: 8–10
Rest: 45–60 seconds
Repeat: 3 times6. Plank Jacks
From a high plank, jump both feet out and in while keeping your upper body steady.
Reps: 20–30
Rest: 45 seconds
Repeat: 2–3 timesFinisher: Plank Ladder
Complete the following with short rest between each:
30 seconds forearm plank
30 seconds right side plank
30 seconds left side plank
30 seconds high plank
30 seconds forearm plankAdvanced Goal
Build toward 2 minutes of clean plank control and strong movement without letting your hips sag, twist, or lift too high.
Key Form Tips
Keep your core tight and ribs pulled down.
Squeeze your glutes to protect your lower back.
Press the floor away through your shoulders.
Move slowly and with control.
Stop if your form breaks.Advanced planks build core power, shoulder stability, balance, endurance, and mental toughness.
Planks are a core-strengthening exercise where you hold your body in a straight, stable position, usually supported by your forearms or hands and toes.
They strengthen the abdominals, back, shoulders, hips, and glutes, while improving posture, balance, and stability.
A simple definition:
A plank is an exercise that trains the body to stay strong, steady, and aligned.
Planks are not just about holding still. They build the core strength and stability that support every movement we make.
Ashley Napoli: Planks
Pull
Ashley Napoli: Planks
Big Ideas,
Real Impact.
Driven by curiosity and built on purpose, this is where bold thinking meets thoughtful execution. Let’s create something meaningful together.
FAQs
Why are these moves important?
These moves help you do everyday activities like sitting, standing, lifting, reaching, walking, climbing stairs, carrying groceries, and getting up from the floor.
They are the foundation of functional fitness.
Are these moves only for exercise?
No. These are natural human movements. Exercise simply trains them so the body performs them with more strength, control, and confidence.
What does a squat help with?
A squat helps strengthen the legs, hips, glutes, and core. It supports everyday actions like sitting down, standing up, and lifting from a lower position.
What is a hinge movement?
A hinge is bending from the hips while keeping the back controlled. It helps with picking things up, protecting the lower back, and strengthening the hamstrings and glutes.
Why are lunges useful?
Lunges improve balance, coordination, leg strength, and hip stability. They also train each side of the body independently.
What muscles do push movements use?
Push movements train the chest, shoulders, arms, and core. Examples include wall push-ups, floor push-ups, and overhead presses.
Why are pull movements important?
Pull movements strengthen the back, shoulders, arms, and posture muscles. They help balance the body and support healthy alignment.
What does rotation train?
Rotation trains the body to twist and turn safely. It supports daily movements like reaching across the body, turning while walking, and playing sports.
Why is carrying considered an exercise?
Carrying builds real-world strength. It trains the grip, shoulders, core, posture, legs, and endurance.
Examples include carrying groceries, laundry baskets, bags, or weights.
What does brace or plank mean?
Brace / plank means training the core to stabilize the spine. It helps protect the back and supports almost every movement the body makes.

October 3-7 | Starting at $5002026 FALL WELLNESS Retreat: Yucca Valley
The Counterintuitive Cure
Why the Move You're Avoiding May Be the One Your Body Needs Most
Do your knees ache after climbing stairs? Does your lower back tighten after sitting all day? Are your hips stiff before you've even had your morning coffee? Many people assume squats are the last exercise they should do if they're dealing with joint pain. But according to yoga instructors, strength coaches, and wellness experts, the opposite is often true. When performed correctly, squats help restore one of the body's most natural movement patterns while strengthening the muscles that support the knees, hips, and lower back.To learn why this timeless movement remains one of the best exercises for overall health, we spoke with yoga instructor Ashley Napoli of Living Lotus Yoga in Larchmont, NY, strength and mobility coach Quavon Reede of Greenwich, CT, and midlife wellness coach Linda Stephens of Darien, CT.Although they come from different disciplines, they all agree: the squat is one of the most valuable movements a person can master.
Why We've Forgotten How to Squat
For thousands of years, humans naturally rested in deep squats. Today, many of us spend eight or more hours every day sitting in chairs.That shift has consequences.Extended sitting tightens the hips and ankles, weakens the glutes and core, and limits mobility. Eventually, even everyday tasks like lifting groceries or getting off the floor become harder because the body has lost an essential movement pattern.Rather than bending through the hips and legs, many people compensate by rounding their backs, increasing stress on the spine.
Yoga's Answer: Malasana
In yoga, the deep squat is known as Malasana, or Garland Pose.Rather than rushing through repetitions, practitioners hold the position while focusing on posture and steady breathing."Malasana isn't about forcing your body into a rigid shape," says Ashley Napoli. "It's about meeting your body where it is today."Napoli often uses yoga blocks or other supports so beginners can safely experience the pose.She's seen remarkable changes."I've watched clients arrive completely locked up with chronic lower back pain. When they finally become comfortable in Malasana, it's like watching a tightly wound coil unwind. They don't just become more flexible—they move, stand, and breathe with greater ease."
Strength That Carries Into Everyday Life
Strength coach Quavon Reede hears one concern more than any other:"People tell me they can't squat because their knees hurt. My answer is usually that they can't afford not to squat."Instead of immediately adding weight, Reede begins with assisted squats, bodyweight squats, or box squats. As strength and mobility improve, clients regain confidence in movements they once avoided.For Reede, the biggest victories happen outside the gym."The proudest moments aren't personal records. They're when a 62-year-old tells me, 'I can finally get off the living room floor without holding onto the couch.' That's the power of proper squat progression—it gives people their freedom back."
Why Squats Become Even More Important With Age
Maintaining muscle and bone strength becomes increasingly important during midlife, particularly for women experiencing hormonal changes.Linda Stephens considers the squat one of the most effective exercises for preserving long-term health."As hormones change, we naturally lose muscle and bone density," she explains. "Compound movements like squats help preserve strength, improve balance, and support long-term independence."She's witnessed firsthand how strength training changes the aging process."Society tells women that slowing metabolism and fading strength are inevitable, but I see clients rewrite that story every day. When a woman embraces the goblet squat, she isn't just building stronger legs—she's increasing bone density, improving vitality, and becoming more resilient."
One Exercise, Full-Body Benefits
Unlike exercises that isolate a single muscle group, squats train the body to work as one coordinated system.Benefits include:Stronger core and lower back musclesMore powerful glutes and hipsImproved knee stabilityBetter ankle mobility and balanceGreater ease with everyday activities such as lifting, climbing stairs, and standing from a chairThe key isn't lifting heavy—it's moving well.
Start Where You Are
You don't need a barbell to enjoy the benefits.A simple progression works for nearly everyone:Beginner: Supported Malasana or assisted squat to improve flexibility and balance.Intermediate: Bodyweight squats to develop strength and movement control.Advanced: Goblet squats using a dumbbell or kettlebell to build functional strength while reinforcing proper technique.Mastering body position before adding weight is the safest and most effective path to long-term success.
The Bottom Line
Fitness trends come and go, but the squat has endured because it mirrors the way the human body was designed to move.Whether your goal is to relieve stiffness, build strength, improve athletic performance, or simply stay active as you age, learning to squat well can pay dividends for decades.Sometimes the movement we fear the most is the one that helps us feel stronger, healthier, and more capable than ever.

Book Review
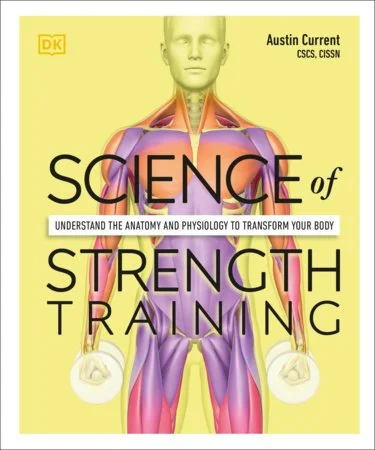
Science of Strength Training
Understading the anatomy and physiology to transform your body
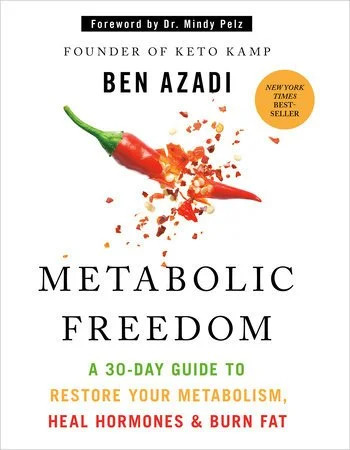
Metabolic Freedom
A 30 day guide to restore your metabolism, heal hormones and burn fat.
Yoga for the Inflexable Male
The New Peri Menopause
An evidence based guide to surviving the Zone of Choas and feeling like yourself again.
New to Wellness?


Find your midline
Cooling breath

Breathwork with Natalie
5 min · Level 1
Vinyasa with Natalie
90 min · Level 2
Quiet your body
Rooting down
Restorative with Audrey
20 min · Level 1
Prenatal with Jaqui
60 min · Level 2

Clearing away the fog
Sound bath with Gabbi
45 min · Level 1

Get unlimited access to each of these featured classes and more.
Unlimited Yoga & Meditation
Improve your practice at your own pace.